14-Inch Kids Freestyle Bike: Fit, Setup & Learn-to-Ride
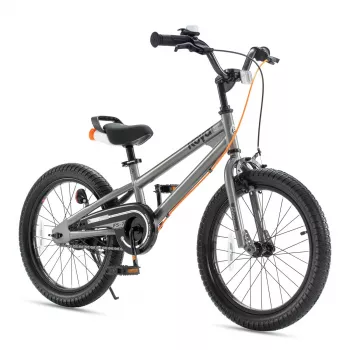
Kids Freestyle Bicycle 14″ Wheel: Easy Learning Bike for Ages 4–12
A 14-inch freestyle-style bike can be a sweet spot for kids ready to move from “just learning” to confident neighborhood rides. The goal is simple: a bike that feels stable on day one, fits correctly so it’s not intimidating, and stays fun as skills level up. Below is a practical guide to fit, comfort, safety, and durability—plus quick checks and a learning progression that helps reduce falls and frustration.
Who a 14-inch freestyle bike fits best
A 14-inch wheel size often suits kids who are outgrowing tiny “first bikes” but still need a compact frame they can control. Age ranges can be wide (often advertised for ages 4–12), but height and inseam matter more than the number on the birthday cake.
- Best for transitions: Great for kids moving from a balance bike or training wheels to independent pedaling.
- Playful but practical: Freestyle-inspired geometry can feel “BMX-cool” for turns, curb rolls, and learning basic handling skills while still working for everyday rides.
- Where it shines: Smooth pavement, driveways, and park paths. For packed dirt, check tread and keep tires properly inflated.
Key features that make learning easier
Learning to ride goes faster when the bike responds predictably. Small upgrades in control and comfort can make a big difference in confidence.
- Stable handling: Predictable steering helps beginners hold a straight line without overcorrecting.
- Reliable braking: Easy-to-reach levers sized for smaller hands help prevent panic grabs and improve smooth stops.
- Comfort basics: A padded saddle, non-slip grips, and pedals with traction keep kids riding longer without “hand slip” or sore feet.
- Durable touchpoints: Sturdy rims, solid spokes, and a strong frame reduce wobble and surprise maintenance.
- Freestyle elements: A BMX-like stance can feel fun and motivating—often the difference between “practice later” and “one more lap.”
Getting the fit right (the biggest factor for confidence)
A correct fit makes starts, stops, and turns feel manageable. A too-tall bike makes many new riders freeze up—even if the bike is technically “their size.”
- Stand-over check: With feet flat and the bike between the legs, there should be a little clearance. Too tall feels intimidating and makes quick stops awkward.
- Seat height: Start slightly lower for beginners so a foot can reach the ground quickly. Raise it gradually as balance and pedaling improve.
- Reach to handlebars: Elbows should be slightly bent. If a child is stretched out, steering gets shaky and wrists can ache.
- Brake lever reach: Kids should squeeze levers without shifting hands far from the grips.
- Weight and maneuverability: A lighter-feeling bike is easier to start, stop, and correct during those early wobbles.
Quick setup and safety checks before the first ride
Even a brand-new bike benefits from a quick once-over. Plan five minutes for setup, then re-check after the first few rides as parts settle.
- Tire pressure: Inflate to the recommended range printed on the tire sidewall. Underinflation can make steering feel heavy and increases pinch-flat risk.
- Bolt check: Confirm tightness on the handlebar clamp, stem, seat clamp, wheel nuts/axles, and pedals.
- Brake test: Roll the bike and apply each brake; the wheel should stop firmly without the lever bottoming out on the grip.
- Chain and drivetrain: Make sure the chain is lubricated and not excessively loose (slack can cause chain drops).
- Visibility: Add reflectors and consider a bell for shared paths.
For helmet fit and head protection basics, review guidance from the U.S. Consumer Product Safety Commission (CPSC) and bike safety tips from the CDC.
Learning progression that reduces falls and frustration
Freestyle-friendly details to look for as skills grow
At-a-glance checklist for parents and gift-givers
| Check | What “good” looks like | Why it matters for learning |
|---|---|---|
| Fit and stand-over | A little clearance when standing over the top tube | Reduces fear of tipping and makes starts/stops easier |
| Seat adjustment range | Can be set low enough for quick foot-down, then raised later | Supports a smooth progression from beginner to confident rider |
| Brake reach | Child can squeeze without moving hands far from grips | Improves stopping control and confidence |
| Wheel and frame sturdiness | Feels solid with minimal wheel wobble | Holds up to curbs, turns, and everyday bumps |
| Tire traction | Tread and rubber feel grippy on pavement | Helps with stable turns and safer stops |
Recommended products
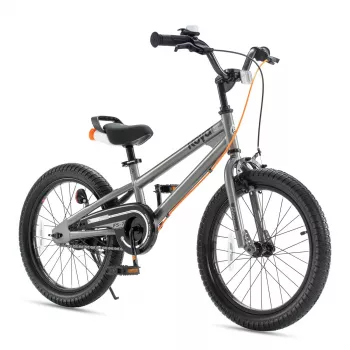
- Kids Freestyle Bicycle 14″ Wheel – Easy Learning Bike for Boys & Girls Ages 4-12 ($352.51): A freestyle-inspired option built to support early confidence and longer-term fun.
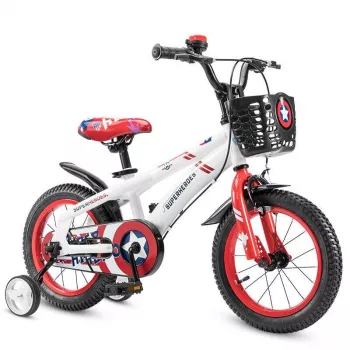
- Kids’ 12V Ride On Land Rover with Remote Control and LED Lights ($460.32): A great alternative for younger siblings or kids who prefer seated driving with parent-assist control.
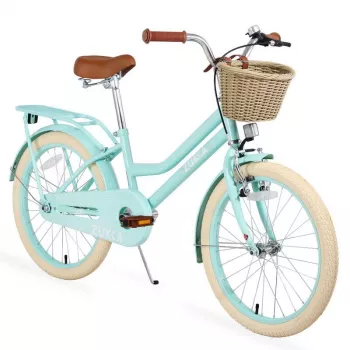
- High-Speed 1/8 Scale Monster Tank RC Car ($803.01): For kids who love speed and outdoor play but aren’t ready to focus on pedaling skills yet.
FAQ
Is a 14-inch wheel bike right for a 4-year-old?
It can be, but height and inseam matter more than age. Do a stand-over check (feet flat with a little clearance) and make sure the seat can be set low enough for quick foot-down confidence; some 4-year-olds fit 12-inch wheels while others are ready for 14-inch.
Do kids need training wheels on a 14-inch bike?
Not always. Training wheels can help some kids feel secure, but they may delay balance learning; many kids progress faster by lowering the seat slightly, practicing gliding (“power scoots”), and then adding pedaling once coasting feels steady.
What safety gear is most important for new riders?
A properly fitted helmet is the top priority. Closed-toe shoes help with pedal grip and foot protection, and knee/elbow pads can be helpful for early learners; reflectors or small lights improve visibility on shared paths.








Leave a comment