Solar Radar Satellite STEM Kit: Build & Test With Sunlight
Solar-Powered Radar Satellite Science Kit for Kids: Build, Experiment, and Learn STEM Basics
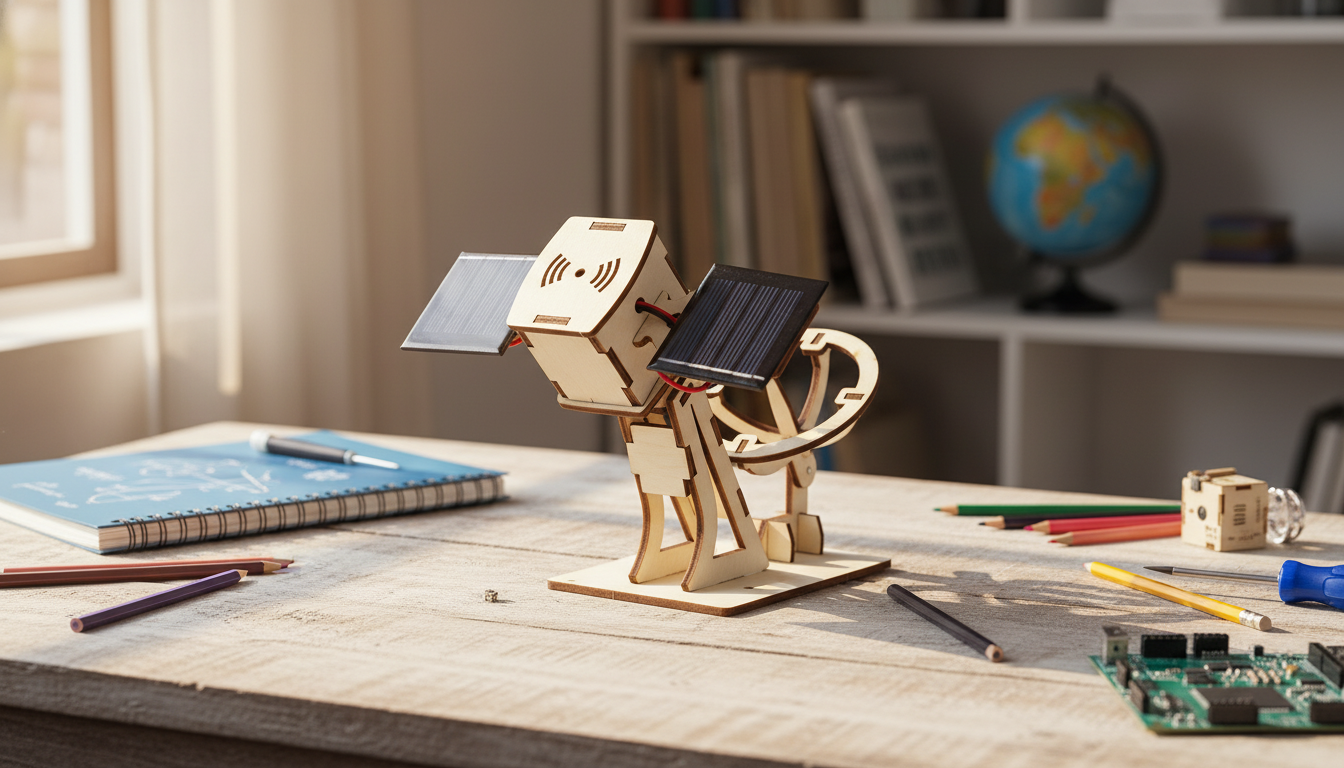
A hands-on satellite-themed kit can make big ideas—solar energy, sensors, and space technology—feel tangible for kids. A solar-powered radar satellite science kit turns “space talk” into a build-and-test experience where children can see how light can power a model, how a sensor-style response can be observed, and how small changes in setup can change results. For more guidance, see Integrating Space Weather into K-5 STEM education through hands ….
For helpful background reading as curiosity grows, NASA’s kid-friendly overview of satellites is a great starting point: NASA Space Place — What Is a Satellite?. For solar basics, the National Renewable Energy Laboratory explains photovoltaic technology in clear terms: NREL — Solar Photovoltaic Technology Basics. For further reading, see Sun and Solar Science Projects | Science Buddies Blog.
What this kit helps kids understand
- Solar power fundamentals: how light energy can be converted into usable power, and why brighter light usually means better performance.
- Satellite basics: why satellites orbit Earth and what they do (communication, imaging, weather, navigation).
- Radar concept in kid-friendly terms: detecting objects by sending and receiving signals (modeled in a simplified, hands-on way).
- Engineering habits: following steps, testing, noticing patterns, and making small improvements instead of guessing.
- STEM vocabulary starters: energy, circuit, sensor, signal, orbit, reflection, data.
What’s included and what to prepare at home
- Do a quick inventory first: check the box contents against the instruction sheet so you don’t have to stop mid-build to hunt for parts.
- Pick a bright work area: a spot near a sunny window is ideal for solar activity; indoor lighting can work, but brightness matters.
- Use a small tray for tiny parts: a bowl or sorting tray keeps screws/connectors from disappearing.
- Helpful extras: small Phillips screwdriver (if needed), clear tape, a notebook for observations, and a ruler for distance tests.
- Best adult role: “guide on the side”—ask questions, encourage careful steps, and let kids do the hands-on building where safe.
Setup tips for better results with solar power
Solar-powered projects are wonderfully simple: more usable light usually means more usable output. The trade-off is sensitivity—small changes in angle and shadows can make a noticeable difference.
- Aim the panel toward the brightest source: tilt and direction matter; a few degrees can change performance.
- Watch for accidental shade: hands, window frames, lampshades, and even the edge of a table can block light.
- Keep the panel surface clean: dust and smudges reduce the light reaching the panel; wipe gently if needed.
- Run quick comparisons: panel flat vs. angled; near window vs. deeper in the room; morning vs. afternoon light.
- Troubleshoot the environment first: if output seems weak indoors, move to brighter conditions before re-checking parts.
Hands-on experiments to extend learning (beyond the build)
Once the model works, the real fun begins: repeating tests, changing one variable at a time, and recording what happened. This turns a one-time activity into mini STEM labs kids can redo and improve.
1) Light-angle test
Change the solar panel tilt in small steps and note when the model responds best. A simple method is to test at 0°, 15°, 30°, and 45° (approximate is fine) and write down what you observe.
2) Distance challenge
Measure how far detection/response works and track results in a simple table. Kids can mark distances on a ruler or tape measure and repeat three times to see consistency.
3) Material test
4) Design tweak
5) “Mission log” habit
Choosing the right age range and difficulty level
Quick comparison: kit highlights and learning outcomes
| Feature | What kids do | What they learn | Simple extension |
|---|---|---|---|
| Solar power component | Position the panel and test light conditions | Light-to-energy conversion and variables that affect output | Angle and brightness comparison chart |
| Satellite theme | Assemble a satellite-like model and simulate a mission | Real-world uses of satellites and systems thinking | Create a “mission log” with goals and results |
| Radar-style detection concept | Observe how the model responds when objects are introduced/removed | Signals, reflection, sensing, and basic data interpretation | Test different distances and materials |
| Build process | Follow steps, connect parts, re-check alignment | Engineering workflow and problem-solving | Try one improvement and re-test |
Common hiccups and easy troubleshooting
Product options in stock
- Solar-Powered Radar Satellite Science Kit for Kids STEM Learning — a space-themed, solar-driven build designed for hands-on experimenting and repeatable learning activities. Price and availability can change; confirm current details on the product page before ordering.
- Using AI to Organize Kids’ Schedule | Digital Guide for Parents on How to Use AI to Organize Family Schedule — helpful for setting up consistent “lab times,” rotating activities, and keeping a simple routine for projects and homework.
- Creative Hollow Star Desk Organizer – Pen & Brush Holder for Office or Study — an easy way to keep rulers, pencils, and small tools together so experiments are quicker to restart.
FAQ
Does a solar-powered science kit work indoors?
Yes, but performance depends on brightness and solar panel angle. For the strongest results, use direct sunlight near a window or a very bright light source and avoid shadows during testing.
What age is a satellite STEM kit best for?
Ages 6–8 typically do best with adult help, while ages 9–12 can often build more independently and run simple measurement-based tests. Teens can extend the project by graphing results and explaining changes using variables like light angle and distance.
What can kids learn from a radar-themed satellite kit?
Kids can explore simplified radar-style ideas like signals and detection, along with solar energy basics and beginner circuit/sensing concepts. It also builds engineering habits such as testing, recording results, and making one change at a time to improve outcomes.


Leave a comment